Getting Started
Step-by-step guide to creating your first animation in the Motion.page Builder.
This guide walks you through creating your first animation in the Motion.page Builder — from opening the editor to publishing a live animation. No code required.
-
Open the Builder
How you open the builder depends on which version you’re using.
WordPress Plugin — In your WordPress admin dashboard, navigate to any page or post and click Edit with Motion.page. The builder opens in a full-screen overlay with the page loaded in the Frame View.
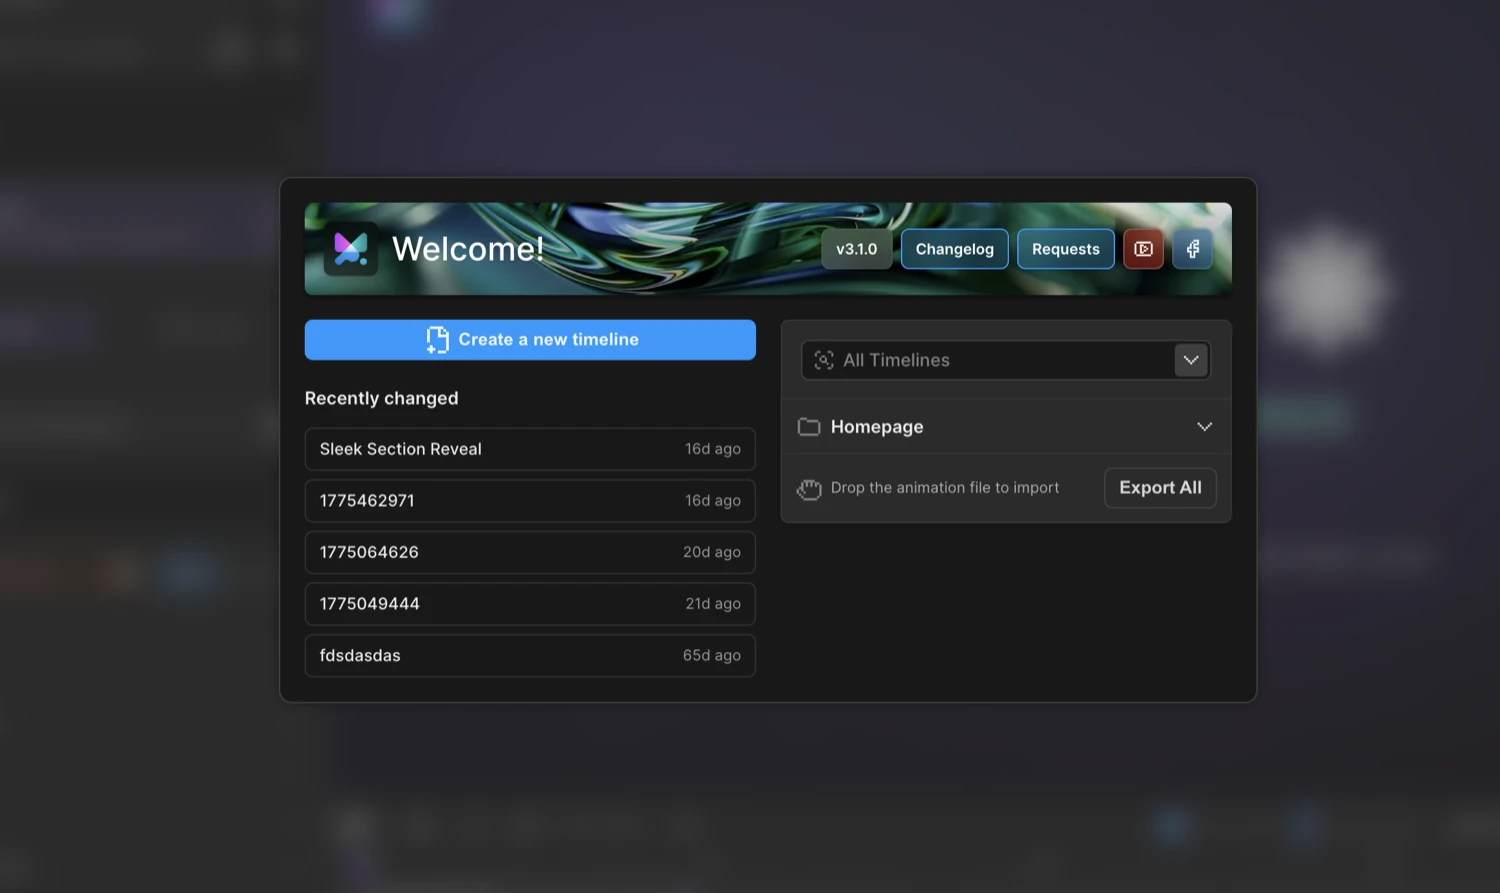
Desktop App — Launch the desktop application and sign in. From the Dashboard, create a new Project (enter a name and website URL) or open an existing one. The project’s page loads inside the Frame View, ready to animate. You can also create an Artifact for standalone animation code that isn’t tied to a specific page.
-
Select an element
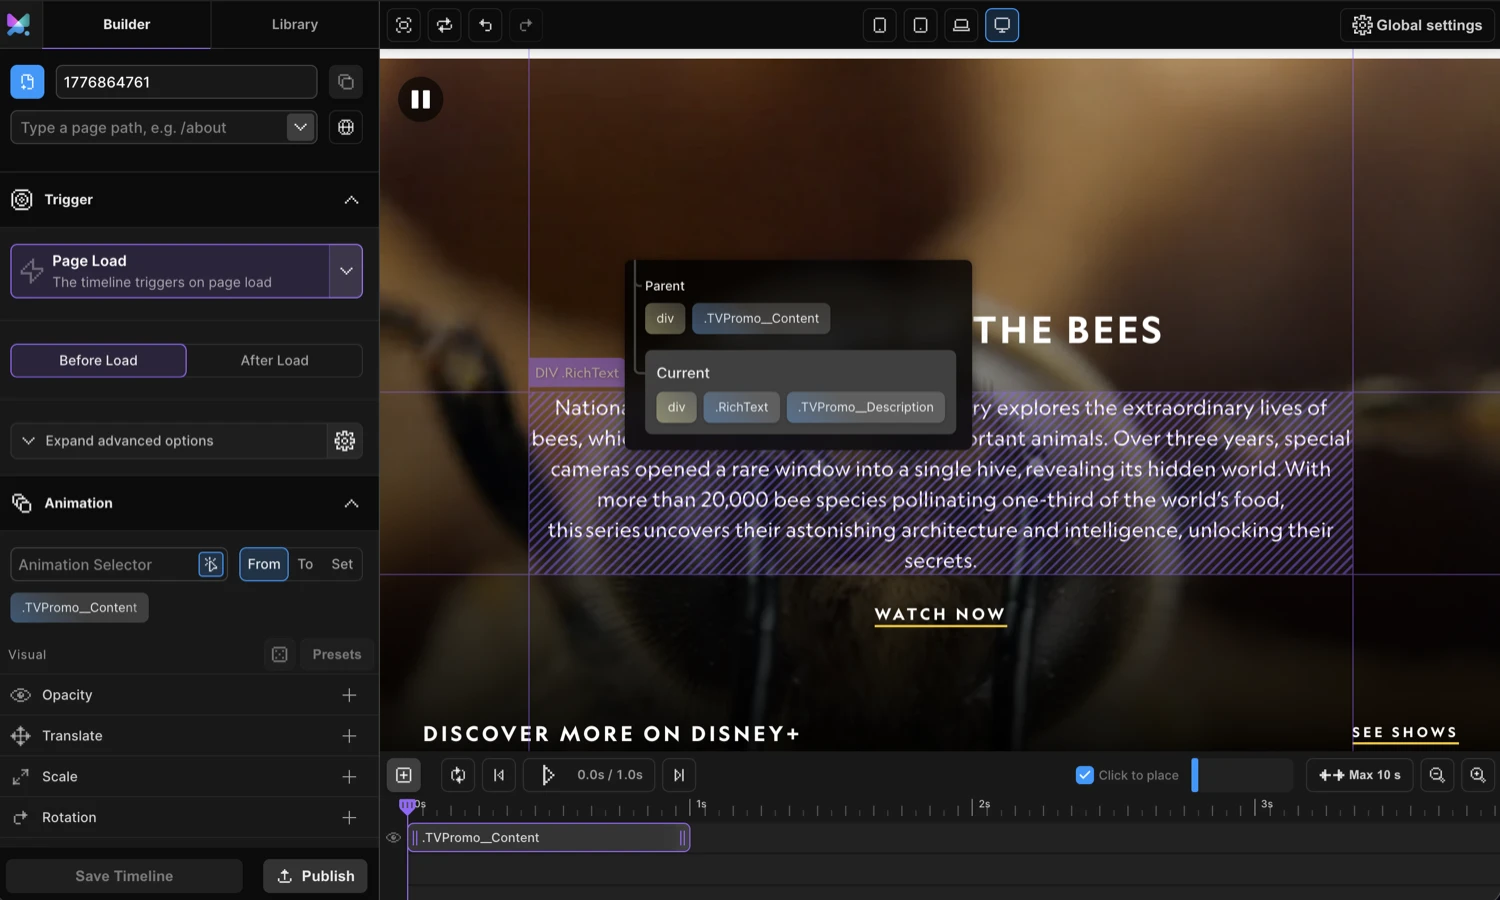
Click any element in the Frame View — a heading, a button, a card, an image. The Left Panel on the left immediately loads the animation settings for that element.
The selector field at the top of the Left Panel shows the CSS selector Motion.page will use to target that element at runtime. If you want to refine it, click the cursor icon on the right edge of the field to activate the Selector Scanner, then click any element to pick from a list of available selectors for it and its parent.
-
Add an animation property
In the Left Panel, open the Animation tab. You’ll see two main tabs: From and To (and a Set tab for instant-set values).
- From — the starting state of the element before the animation plays. Use this for entrance animations.
- To — the ending state the element animates toward. Use this for exit or emphasis animations.
Click the From tab, then click + Add Property (or the
+icon in the property list). A picker appears — choose a property like Opacity or Translate. The property row appears with a toggle to enable it and an input to set its value.For example, set Opacity to
0in the From tab — this means the element starts invisible and fades in when the animation plays.
-
Preview the animation
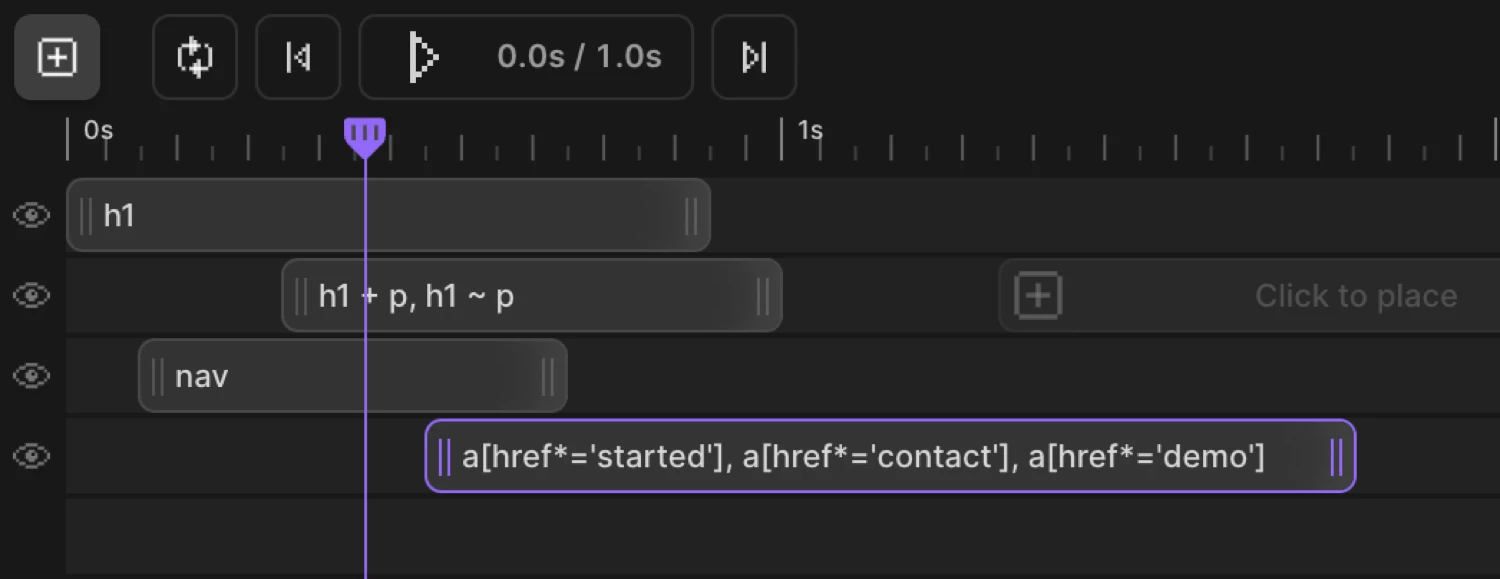
Hit the Play button in the Timeline Editor at the bottom of the screen to preview your animation immediately. The playhead scrubs through the timeline and the element animates in the Frame View.
For trigger-based animations (scroll, hover, click), enable the Live Play toggle in the Top Panel. This activates the trigger on the live page inside the Frame View — scroll the page to fire a scroll animation, hover an element to fire a hover animation, and so on.
-
Choose a trigger
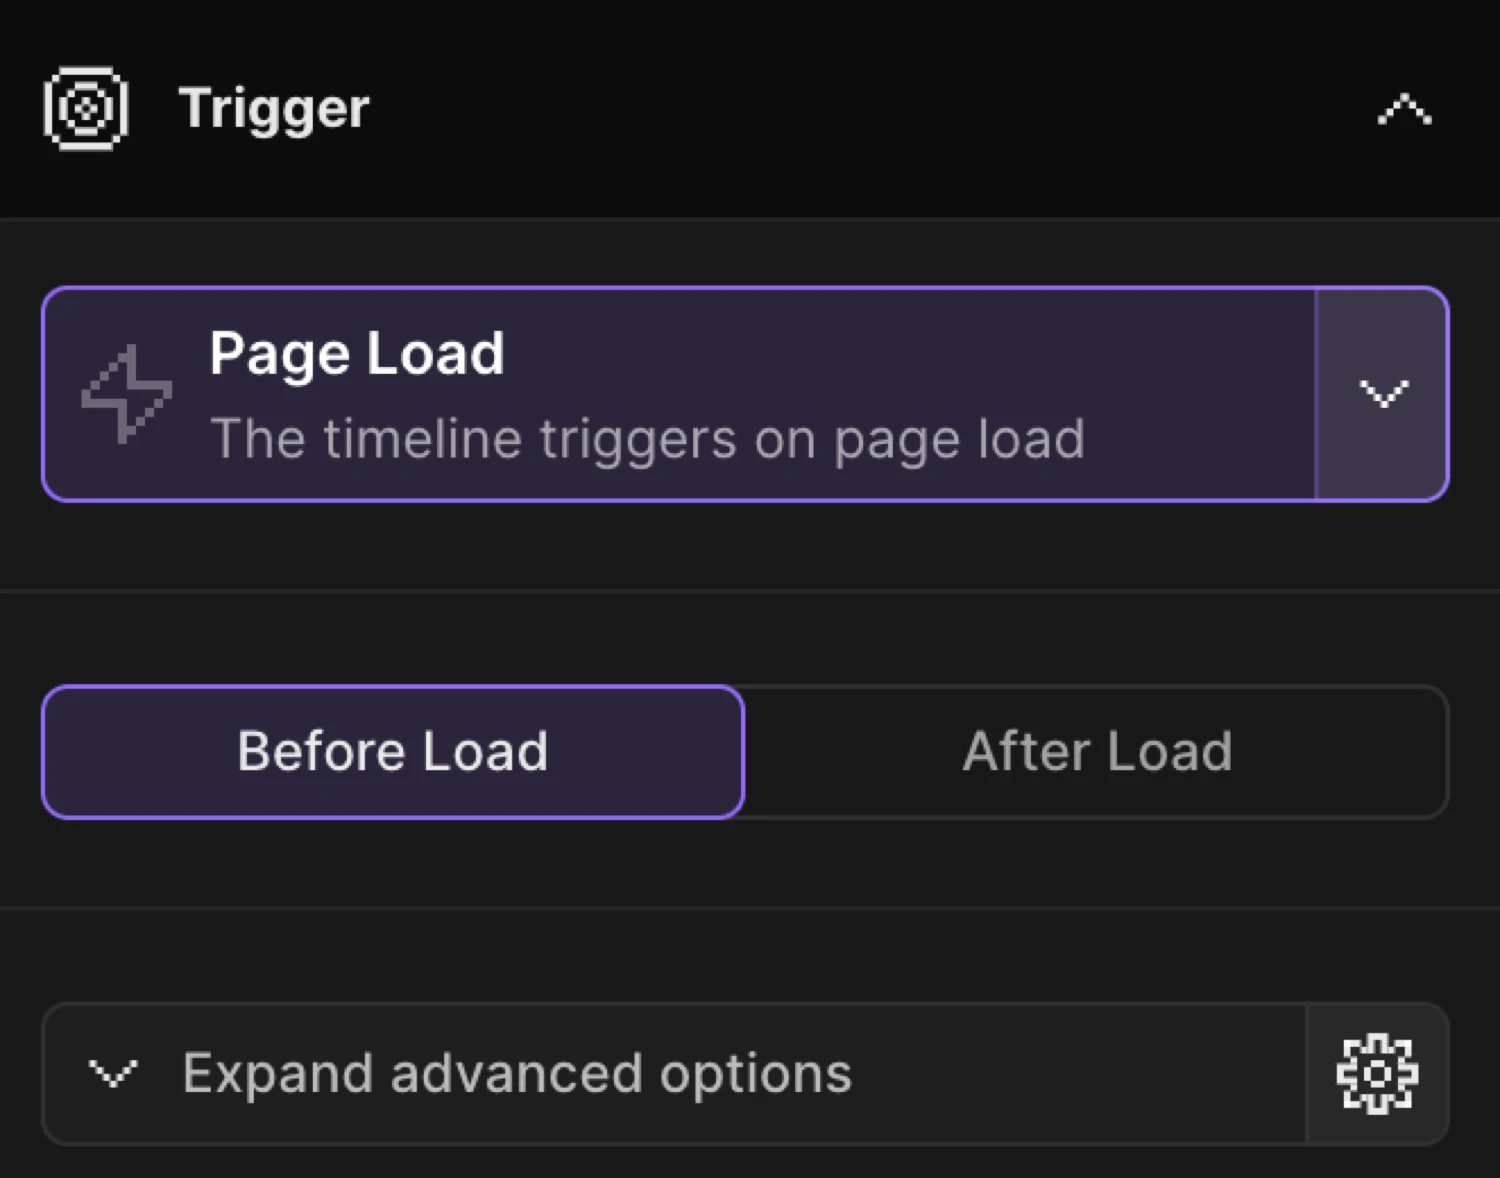
Every animation needs a trigger — the event that tells it when to play. In the Left Panel, switch to the Trigger tab.
Trigger When it fires Page Load As soon as the page JS initialises — good for hero sections and above-the-fold reveals. Scroll When the element scrolls into view; can also scrub with the scrollbar or pin in place. Hover On mouse enter — configure reverse, restart, or hold on mouse leave. Click On element click — reverse or restart on second click. Mouse Movement Timeline progress tracks cursor position relative to a container. Gesture / Observer Responds to pointer, touch, wheel, and scroll direction gestures. Page Exit Plays when a link is clicked, just before the browser navigates away. Pick Page Load to start — it’s the simplest and requires no extra configuration. The animation will play automatically every time the page loads.
-
Save and publish
When your animation looks right, hit the Publish button in the Top Panel (top-right corner of the builder).
WordPress — Publish writes the animation configuration to your site. The animation is immediately live for visitors — no separate deploy step needed.
Desktop — Save stores the animation in the project. Use Export to copy the generated SDK code, which you can embed in your site’s
<head>or include in your build.
What just happened?
When you hit Publish, Motion.page generated a named animation timeline — something like this under the hood:
import { Motion } from '@motion.page/sdk';

Motion('hero-heading', '.hero h1', {
  from: { opacity: 0, y: 30 },
  duration: 0.7,
  ease: 'power2.out',
}).onPageLoad();
The SDK handles scroll detection, trigger lifecycle, and all animation wiring. The builder is a visual interface on top of exactly these function calls.
Here’s the kind of animation you just built — an element fading up from below on page load:
Next Steps
Now that you’ve created your first animation, explore what else the builder can do:
- From, To & Set — understand the three animation modes and when to use each
- Element Selection — target single elements, groups, and dynamic selectors
- Easing — shape how your animation accelerates and decelerates
- SDK Overview — use the SDK directly to go beyond what the builder’s UI exposes